Showing posts with label Loribelle Bags. Show all posts

Sunday, October 30, 2011

Free Shipping at my Etsy shop!

This week only I'm offering FREE SHIPPING at my ETSY SHOP! This is for any US address only. Just enter FSOCT11 in the coupon code box.

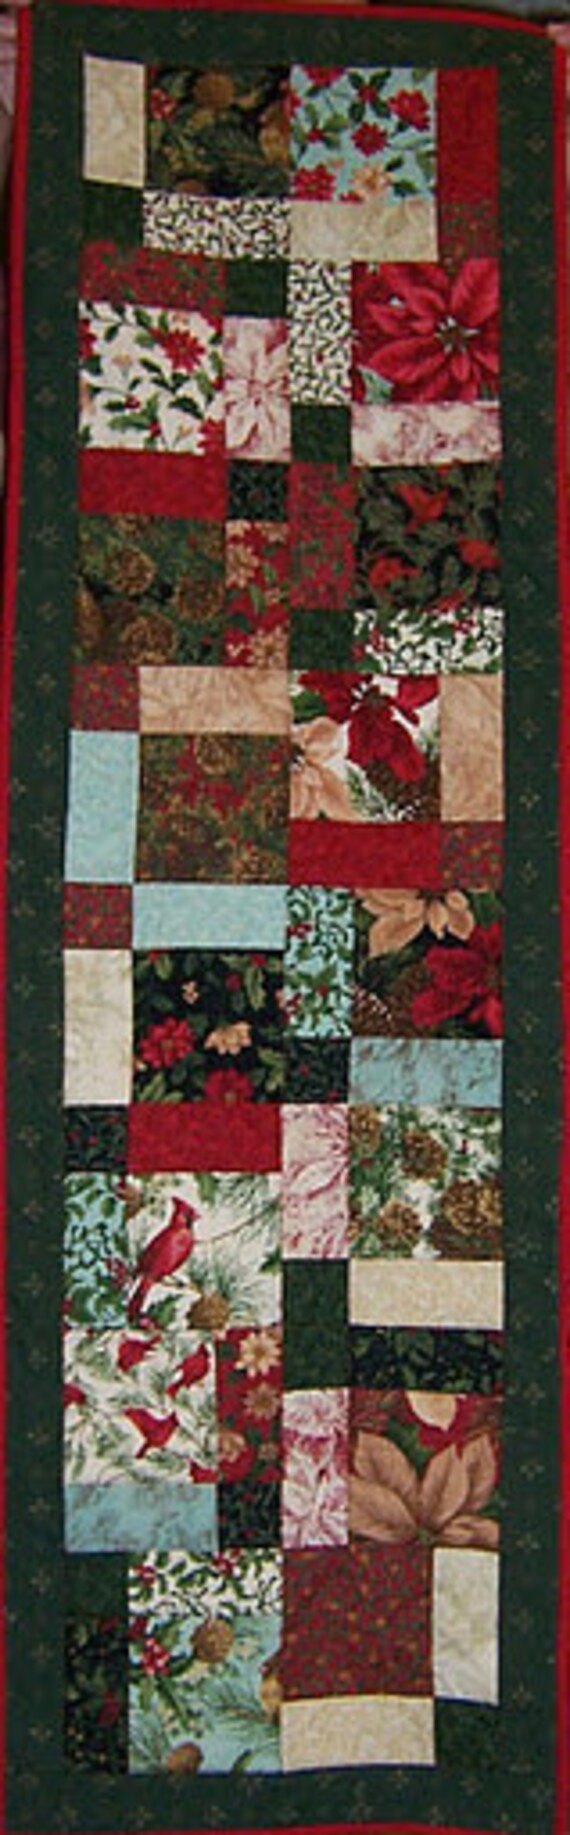
Here are a few new items in my shop:
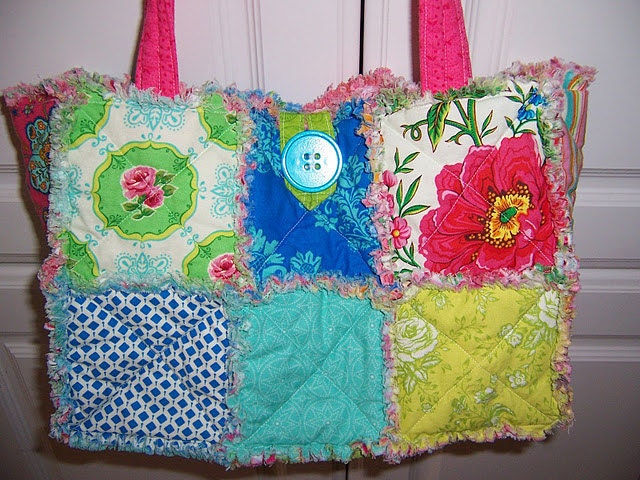
Rag Bag using Moda's Summer House
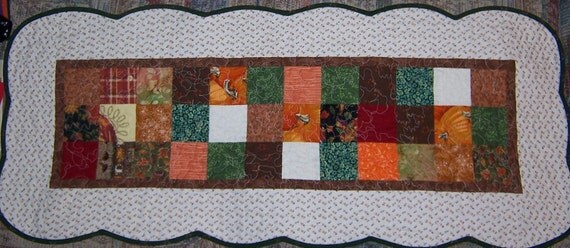
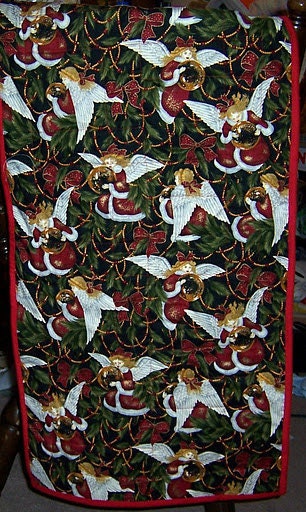
Reversible Table Runner with Fall on one side, Christmas on the back

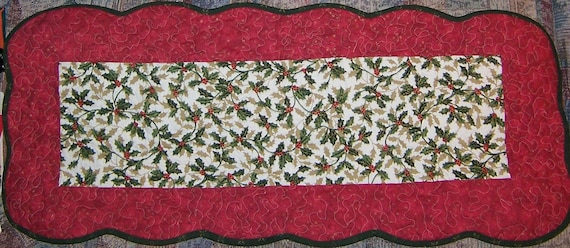
Reversible Christmas Table Runner with close up of back

I have a few more items in the process of being completed. There's a Christmas quilt with Moda's Basic Grey Fruitcake fabric, another bag with Moda's Summer House fabric and 2 quilts that are waiting to be quilted. I will add pictures of those soon so check back!

I would love to have you share this special with your friends. Feel free to blog all about it!

Have a blessed day!

Friday, July 8, 2011

Laptop, Netbook or I-pad/Tablet bags

How would you like a one of a kind bag or envelope cover for your portable computer? Here are some I've made and can custom design in your colors to fit your electronic device.
Fun stitching and applique!

Back of bag

Loops for removable strap

Pretty flowers inside!


Fun Curvy striped Bag for my friend Emily!
Just some fun little touches---ribbon to match! Love Hobby Lobby!

Back with loops for removable strap (made out of the matching ribbon)
Fun little make-up bag Emily ordered. Love this! Pockets inside, too!

 Contact me for more info if you'd like to order a custom designed bag! I'll be adding more bags to my Etsy site as they become available. www.chefmama.etsy.com

I made this!

If you haven't visited my Etsy shop in awhile, I've listed several items and hope to get some more listed soon! Here's a sampling:
Casserole Carrier/Table Quilt in One!

Fun Pink Purse

Another Fun Pink Purse!
And here's a project Phil & I started about 13 years ago. It's an ongoing piece of work. And, yes, there is a story for this, but that will have to wait!

Wednesday, June 8, 2011

New items at Etsy!!!

I have finally updated my Etsy page! Check out my current listings & PLEASE pass along my website to anyone who might be interested! Thanks!  http://www.etsy.com/shop/ChefMama

Thursday, January 20, 2011

Loribelle Bags on Sale


Just discounted & relisted 4 bags on my Etsy site. More soon! Will put craft fair items here soon. Blog Candy, too! Feel free to spread the word! Thanks!

PS---Look Karen no paisley! : )

Monday, June 7, 2010

Introducing the Emily Anne Bag Trio

Okay, I've never used a 2nd name for a bag & will edit that later, but this just called for a middle name & I don't know Em's middle name, so I put mine in! Bwahahahahaha! It happens after midnight when your child is still not asleep & you are delirious.

My friend Emily wanted one of my ruffled bags, but she wanted it sized like her body, she told me (I didn't make this up!): short & wide! LOL! She's a nut! Also, like other fans of those fancy quilted bags, she wanted pockets. I gave her a few options, but the more I sewed, the more I decided I needed more & more pockets. THe downside is I have so much fabric, I hope it doesn't exceed the airplane weight allowance! ha, ha!


Em also wanted a make-up bag. I put some pockets in that, too.

What Emily doesn't know (shhhhh, don't tell her---LOL) is that I had wanted to make a billfold. As I was running out of time I decided to wait on this & mail it later. Well, last night that bag, my machine & I were not on speaking terms. It really wasn't the bag's fault. It was the bobbin's fault. But it made the stitching on the bag very ugly & not sturdy. So, I decided to try putting together this little billfold. I am addicted. It was so much fun and it turned out SO STINKIN' CUTE, imo.

These pictures are rough & unedited from my phone camera (since we still haven't found our battery charger for the real camera. I'll be "cleaning them up" and putting a listing on my Loribelle Bags blog with pricing info. Need to get this in the mail tomorrow.

Tuesday, May 18, 2010

The Leona Geocaching Bag!


Phew, I think my brain just worked too hard! LOL! My dork sister Leona asked if I could make a geocaching bag for her. Some of you asked what a geocache bag was. Okay, EMILY asked! LOL! It's a bag used for geocaching. Clear as mud, right? Apparently, according to THIS site, geocaching is a "high tech treasure hunt" game. People hide small objects or sometimes just a page to sign, I THINK, and you use a GPS to navigate your way to the hidden geocache. It doesn't make a lot of sense to me yet, but several of the dorks started doing it with their kids & are having a great time with this. If you're new to my blog, the "dorks" are a group of women who enjoy rubber stamping and papercrafts and happen to be a little quirky or do silly things and admit it! LOL!

Leona wanted several different compartments for different items. This was the biggest challenge: figuring out how in the world to put in compartments. I figured it out, as you can see. Then, sewing the dividers down at the bottom was the next quandry. I ended up hand whipstitching these to the base of the bag. Next, I had to figure out how to put the inside & outside together. Typically, the inside of a bag is empty, so I just put the right sides of the fabric together, sew, and turn it right side out (flip your shirt inside out to see the stitching, then turn it the right way & this might make sense---but don't take your shirt off to do this unless you are alone. Just sayin'.). I also realized when I was working on how to put them together that the flap/lid had to go on somewhere before I put the parts together. I figured that out & sewed on the flap, only to discover I'd put it on backwards, with the striped side OUT! oops! Thank goodness for seam rippers. I finally figured the whole thing out & managed to put it all together today.


One thing I might change would be the top. I think a zippered top would be better on such a large bag. I'll let Leona try this out & see what she thinks. Leona got the "prototype" price but after making this, I am going to figure out what I will charge for custom bags like this. Also, I'm considering making the compartment section removable. In the meantime I have orders for a costume and another bag, so I'll leave this one until I get another request, I think.

Let me know what you think of this type of bag! I love your comments!

Saturday, May 1, 2010

New Bag & New Look!

If you want to read a funny story about what kids do in Texas when it's hot & there's no pool, or if you want to see what I made that I can eat & is WOW so good, you can check out my family blog HERE.

Here's a picture of my latest bag. You can read all about it in THIS post.

Now for the new look! All of the bags I've made so far have used a standard "grid" design. By that I mean, I sewed a bunch of lines going one direction (on the diagonal), then I criss-crossed those with diagonal lines going the opposite direction. I've seen something called "Free Motion Quilting" and have been reading about it for months now. I even bought the special foot for this a couple of months ago. However, it wasn't until recently that I ventured to actually try this. I started on scraps, but got brave enough to try it on a bag that I had cut out but had yet to quilt.

You may need to click on the images to see the details, but in this type of quilting, you move the bag around on the sewing machine whichever way you want to stitching to go. You have to lower the little "feed dogs" (those metal bars that pull the fabric through the foot as you sew). My old machine didn't have this feature, so I was so happy to get a machine last fall that was able to do this! By doing this, it's almost like you're "drawing" with your needle, but instead of the needle moving, as a pen would, you move the fabric to create the designs. I did what I have learned is called a "meandering" stitch. It works for me. I meander all the time. I thought it would look pretty with this bold print. I will tell you that I have the thread color memorized (it's Coats 1840 if you wondered!) and am still working on more PINK bags, so I may need a refill of that thread!

I also decided to buy some actual quilting thread and used that on this bag. The all cotton thread has a feel that is almost silky. It's not at all what I expected, but I love how it feels. It's a fun change and it opens up a new area of quilting for me. There are about a gazillion different "free motion" stitches you can do, so I have a feeling I'll be "trying" this method for a LONG time!

Thanks for stopping by!

Thursday, April 22, 2010

THREE new bags!


Wanna hear something funny & dorky? I thought I had posted each of the purses I made on this blog. I put them on my Loribelle Bag Blog, but thought I'd linked them to THIS one, which has all of 5 followers vs. my family blog which has about 2 followers. Yes, I am the most popular blogger of all. Ha, ha!

Anyway, I did get 3 bags finished this week. You can see them all on my bag blog HERE. Also, if anyone missed it, I've posted the Kathy Kraft Carry-All Tote, which is still missing straps, but I'm working on it.
Speaking of Kathy, I don't remember if I posted a picture of her after getting her 3 feet of hair cut off. She has CURLS! It's so cute as people see her as her long hair was pretty straight. They ask how it is to care for & she just grins & says she just lets it dry! So pretty. Today she had appointments with doctors out of town about the cancer. Waiting anxiously to hear what she found out. Please do keep praying. Insurance issues are a nightmare, so I know she'd appreciate prayers all around.

Maybe I can make a card this weekend. That would be nice! Thanks for stopping by!

Wednesday, March 24, 2010

Introducing the Kathybelle Kraft Carry-All Tote Bag!

At long last I am introducing my "Dream Child" to you. This is a bag that I have been planning in my mind for months. You must know that this bag is currently "Strapless" but we are working on that. The ones I sell WILL have straps! I won't put this onto my Loribelle Bags Blog page until I get that finished.

The story: when my friend Kathy saw one of the first tote bags I made, she immediately lifted it to see if it would go on her shoulder. It wouldn't. We ended up giving that to a child & it does go on HER shoulder. LOL! So, I made a mental note: make straps shoulder length. Then she said, "you know it needs to be wide enough to hold scrapbook paper." She is the Queen of Scrapbook paper. I know some of you have also told me you just love to have scrapbook/designer paper, so you can relate to her concern. Kathy had given me this great little bag that will hold a standard 12" paper cutter along with some ink pads & smaller sized items. I loved the concept it had with multiple compartments. I just wished that it would also hold paper and a few larger items.

I had a few other thoughts of my own to add. For several years I have been hauling my stamping stuff to & from different places. Some days it's been McDonald's where I could sit, stamp and color while my kids played. When we go to my mother-in-law's house I often take my supplies to work on. Then there have been times I would have enjoyed going to a friend's house to stamp. I've done it a time or two, but the thought of loading it all up & having to unpack it all to find anything to use just didn't make it much fun. So I decided a tote needed to be available that could REALLY hold what I needed and not take forever to find it.

This is what I wanted in addition to the above things:
*place for ink pads
*place for my personal stuff so I could leave my purse behind
*place for my cell phone so I could easily reach it
*place for my Scor-Pal
*place for other little components of stamping.

My dear "Dork Sisters" had one word that was most important in a bag: POCKETS. That's what I needed for this bag to do all I want it to do.

HERE is a guided tour of the new Kathybelle Kraft Carry-All Tote Bag. I need to measure this bag, but it is a BIG BAG!
This is one side of the outside. The pocket extends nearly the full width of the bag and has a zipper so you can put all those purse supplies into this pocket.


The other side of the outside has 2 large slip pockets. As you can see I can fit 2 different types of stamp sets in these pockets.
One side of the outside has a pocket for your cell phone.

The other end has a water bottle pocket.

Now the real fun begins with the inside!


This side has 2 long slip pockets. One is large enough for a paper cutter. The 2 smaller slip pockets are just right for ink pads.

This side has a pocket big enough for a Scor-Pal! There are 4 pockets big enough for ink pads or even small stamp sets. Below are more ideas for what to put in these pockets.

This end of the inside has 2 slip pockets. I found they are large enough for a fairly large punch. These could be made to fit your specific punch sizes or other tools. I put a jar of flowers in the top pocket.
In this model, I made one long slip pocket. I discovered it was perfect for my heat tool. This could be made with 2 short pockets instead.

I think the only item I cannot put in my bag in my Big Kick, IF I have the bag loaded with other items. I think I could put even the Big Kick in if the bag were empty.

In this model, I used a canvas fabric for the exterior and some pockets and cotton solids for the lining and borders. I used a VERY heavy interfacing so this bag is VERY sturdy.

This bag is going to start at $50 and will be a CUSTOM ORDER BAG. That means you can choose the fabric, pocket sizes, number of pockets, etc. I can make this a quilted bag for an additional charge.

I will be making add-on bags to go with this for other items (such as markers), so look for those to come.

I will be post this to my Loribelle Bag Blog and my Etsy site as soon as I get the straps attached. Until then, I would love to hear your feedback. I also will take orders for this bag now, but will not be starting those for at least 2 weeks.

Thank you for stopping by!